Immediately after the repair and decoration of the walls with beautiful bathroom tiles, the bathroom looks simply wonderful – everything shines and pleases the eye. But time passes and gradually the tiles on the walls lose their original appearance: they become dull, dirt appears, the seams between the tiles lose their original beautiful color and turn yellow, nondescript.
Almost nothing remains of the former beauty. And then there is a desire to update the old tile to give it a beautiful look again without changing the finish. How this can be done in different ways, and we will talk in the article below.
Renovation Of Tile Joints
The first thing to start in updating the appearance of your bathroom walls is cleaning the tile joints. As a general rule, it is in the joints between the tiles where the greatest amount of dust accumulates if there is poor ventilation in the bathroom, and it is also in the joints where dirty water accumulates during wet cleaning, when the tiles are washed with a damp cloth.
Old grout dries over time and microcracks form along the seam, in which various impurities accumulate. If someone in the family smokes, the grout in the joints between tiles quickly turns yellow, which becomes very noticeable when decorating the walls with blue or white tiles.
Therefore, joint cleaning can significantly improve the appearance of the mill without the much more labor-intensive work of replacing old tiles with new ones. To clean the seams, you need a metal putty knife. Use a putty knife to scrape off the top layer of the old grout. Then dilute the new mixture in a suitable container to fill the tile joints and apply the grout over the old one.
If the old grout has become completely unusable (for example, due to the development of a fungus), it is better to remove it completely. This will take more effort, but it will prevent mold and mildew from reappearing. To completely remove the grout, you can use a special tool. Once applied, the grout softens and is much easier to remove.
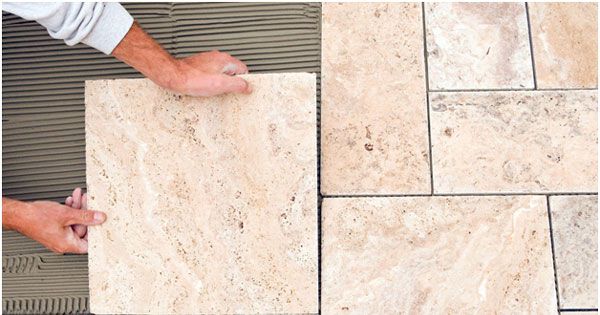
Wall Tile Replacement
But it happens that just replacing the grout is not enough: during a long service time, the tiles on the walls of the bathroom can be damaged in some places. Cracks, chips and scratches spoil the appearance of the walls, and in this case, it is better to completely replace such tiles. To make a replacement, you will need to very carefully remove the cracked tiles, taking care not to damage the adjacent ones.
To do this, you can use a chisel and a hammer. Previously, a hole was made in the center of the tile with a drill using a special drill for the tile. After that, the tile pieces are broken from the center of the tile to the edges until the tile is completely removed. You can see a video of how to remove the broken tiles.
After replacing the tile, you need to fill the joints between it and the adjacent tiles with grout. After the grout has dried, the seams should be sanded completely with fine sandpaper.
We clean the tiles
Once the work described above on cleaning the joints and partial replacement of the tile has been completed. It is necessary to clean the tiles from dirt on all wall surfaces. This will require 6% vinegar or citric acid. Note that it has exactly table vinegar, and not essence, which can cause severe chemical burns.
Vinegar or a weak citric acid solution can be applied to the surface of the walls with a cloth, sponge, or spray bottle. After application, rub gently and rinse with clean water, then pat dry. To give the tiles a shine, it can be cleaned with a weak ammonia solution, which removes grease well.
Decorative Wall Vinyls
If you want not only to update the mosaics, but also to slightly change the appearance of the walls, you can use various methods to decorate them directly on the mosaics. One of the most common wall decorating methods today is with vinyl decals. The wall decoration with stickers is shown in the photo below:
Drawing On A Tile
Another way to update the interior of the bathroom is to paint the tiles with paint. To do this, you can use a spray can with automatic enamel or apply a permanent paint (such as epoxy) with a roller. Before tackling the paint, on the tiles with the help of masking tape, you need to glue the areas where the paint will not be applied:
Then paint on the unglued surface of the walls: After removing the tape, the pattern will remain on the tile. Instead of masking tape, you can use stencils to draw pictures. You can make a template yourself for drawing a picture on the walls. To do this, you just need to print the selected image on a printer and cut holes for painting in it with a clerical knife.
Tape can be taped onto the stencil paper to make the stencil last longer. As you can see, there are many different ways to update your bathroom tiles. To shine with new colors. It remains to choose exactly the one you like the most! As for the bathtub or shower, a custom shower pan can also help
breath new life into the room and change things up!

Reblog It collaborates closely with clients to develop tailored guest posting strategies that align with their unique goals and target audiences. Their commitment to delivering high-quality, niche-specific content ensures that each guest post not only meets but exceeds the expectations of both clients and the hosting platforms. Connect with us on social media for the latest updates on guest posting trends, outreach strategies, and digital marketing tips. For any types of guest posting services, contact us on reblogit.webmail[at]gmail.com.