Today, several basic floor finishes are used. As a rule, these are self-leveling floors, characterized by the simplicity of the device and a variety of types, finishing the floor with tiles or laying porcelain stoneware. Wooden floors in the bathroom are much less common, as they do not meet the basic requirements for flooring in humid rooms with high temperatures.
One of the most durable coatings is porcelain stoneware flooring. Let’s see how porcelain stoneware differs from tiles, what type of glue is needed to lay it on the floor and also find out what the technology for laying porcelain stoneware on the floor consists of.
What is the difference between porcelain stoneware and ceramic?
Sometimes, at first glance, it is not so easy to distinguish ceramic tiles from porcelain stoneware. But they have differences and these differences are very significant. Thus, for example, porcelain stoneware can withstand much greater mechanical stress than tiles.
In addition, due to the peculiarities of the production technology of porcelain stoneware, it has a certain color not only on the outside, but also on the inside. The color is formed during the formation of the tile itself. At the same time, in a cut of a tile, you can see the same color as on its surface. Whereas for ceramic tiles, the pattern is applied to an already finished product.
Advantages of porcelain stoneware flooring
In addition to the fact that porcelain stoneware can withstand greater loads, its advantages also include:
- Resistance to chemical detergents
- Resistance to high ambient temperature
- Resistance to the direct action of water
- Durability
- A variety of colors
- A large selection of sizes.
Thanks to these properties, the use of porcelain stoneware is not limited to interior spaces. Since this material does not absorb moisture, it is used for exterior decoration, since when it freezes it does not collapse due to the expansion of liquid particles, as it happens with other materials.
Porcelain stoneware arrangement
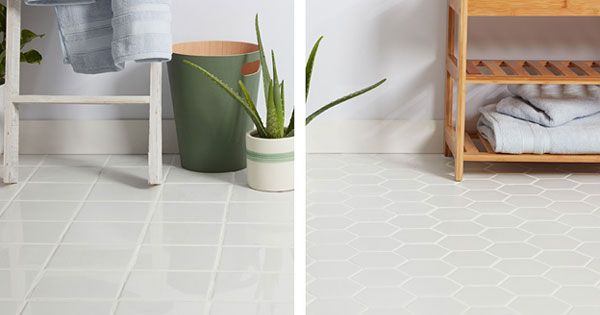
Porcelain stoneware can be laid both in a standard and an extended way, with a herringbone, several stairs, at an angle and in the form of complex compositions of tiles of different colors.
Some options for the arrangement of porcelain stoneware are shown in the following figures:
In any case, the porcelain stoneware installation can be done according to your own vision and artistic taste.
It is advisable, before proceeding directly to laying the tiles on the floor, previously paint the layout, taking into account all the gaps, to be able to imagine how your floor will look once the work is finished, as well as count the number of tiles and glue to tiles.
You can find out how many tiles you need with our online calculator. Simply enter the dimensions of the surface and the size of the tiles to perform the calculation.
Adhesive for laying porcelain stoneware
As noted above, one of the characteristics of porcelain stoneware is its dense structure, which practically does not absorb moisture. That is, its surface does not have pores through which water can enter.
But due to this characteristic, the surface of the porcelain stoneware does not absorb the adhesive composition. Therefore, to lay porcelain stoneware tiles on the floor, a special glue with higher adhesive power is required. Only that glue will be able to hold the tiles securely.
Porcelain stoneware installation technology
To install porcelain stoneware, you need the following tool:
- a nozzle for an electric drill for mixing glue
- a level to check the horizontality of the tiles to be laid
- a straight spatula to apply glue to the floor and tiles
- notched trowel
- Rubber mallet
- Tile cutter
- rubber spatulas for grouting.
The installation of porcelain stoneware tiles does not differ much from the installation of conventional ceramic tiles.
Laying tiles, as a rule, begins from the wall opposite the entrance. Before laying the tiles, the floor surface must be carefully prepared. If necessary, the screed is made first and the porcelain tile is laid on the screed after it has completely dried. If the base is strong and level enough, simply clear it of debris, sweep and vacuum.
Once the base for laying porcelain stoneware tiles has been prepared, you must prepare the glue. To do this, the dry mixture is diluted with water in a container of sufficient size. To make the glue homogeneous, mix it with water with a special mixer.
Once the glue is ready, it is applied in an even layer to the floor, covering enough area to lay 3-4 tiles, plus a small allowance so that after laying, the glue sticks out several inches beyond the tiles. With the help of a notched trowel, grooves are formed in the applied adhesive layer, which ensure better adhesion of the adhesive to the base and porcelain stoneware.
A small amount of glue is applied with a straight trowel directly onto the tile and grooves are formed in the glue layer, as well as the floor, using a notched trowel.
To maintain approximately the same distance between the porcelain stoneware tiles to be laid, the tiles are first laid vertically on the edge against the previous tile (or against the wall for the first tile). Then it falls to the ground. In this case, there will be a gap the size of the thickness of the tile between it and the previous tile.
A more reliable way to level the porcelain stoneware to be laid is by means of plastic crosses, which are available in various thicknesses. You can always choose such crosses for yourself, the seam of the thickness you want to get. Furthermore, modern tile leveling systems have proven themselves, allowing the tiles to be laid very evenly.
As you can see, the system is quite simple and efficient. Even a layman can lay porcelain stoneware using a tile leveling system. If necessary, the tiles are cut with a tile cutter. If you don’t have a tile cutter, then the tile can be cut with a carbide drill or other improvised items, as shown in the video:
Each tile is carefully pressed into the adhesive, the excess adhesive is stretched with a spatula to lay the next tiles. The horizontality of the porcelain tile laying is controlled by a level set from above, as shown in the photo:
If it is necessary to “drown” the protruding tiles a bit, it is done with a rubber mallet, which is beaten on the tiles over their entire surface until it settles to the desired level.
Thus, they are arranged row by row until the entire surface of the floor is covered with porcelain stoneware. After that, the porcelain stoneware should be left on for the necessary time for the glue to harden. As a general rule, it is 1-2 days.
If the tile is well pressed into the adhesive composition, leveling crosses are installed between the tiles, and the tiles themselves are large enough (300×300 or 300×600), then under their weight distributed across the boards, it is unlikely that the tiles move. Therefore, you will be able to “out of necessity” after laying the tiles without fear of disturbing the finish.
Once the adhesive has dried, the grout can be applied. In the next post we will talk about how grouting is done correctly.
As you can see, there are no special tricks for laying porcelain stoneware with your own hands on the bathroom or toilet floor, so you can easily carry out all the necessary operations yourself.

Reblog It collaborates closely with clients to develop tailored guest posting strategies that align with their unique goals and target audiences. Their commitment to delivering high-quality, niche-specific content ensures that each guest post not only meets but exceeds the expectations of both clients and the hosting platforms. Connect with us on social media for the latest updates on guest posting trends, outreach strategies, and digital marketing tips. For any types of guest posting services, contact us on reblogit.webmail[at]gmail.com.
At Masara Ceramica India Pvt. Ltd., we are passionate about creating high-quality ceramic and porcelain tiles that make homes, offices, and commercial spaces look elegant and stylish. With years of experience in the tile industry, we focus on innovation, design, and durability. Our tiles are made with advanced technology, ensuring they are strong, long-lasting, and beautiful.
We believe that tiles are more than just a part of construction—they are an expression of style, personality, and creativity. That’s why we offer a wide variety of tiles in different colors, patterns, textures, and sizes to match every customer’s unique taste.
Lonix Ceramica TILE BUSINESS is a leading manufacturer and exporter of high-quality ceramic tiles, based in Morbi, India. The company specializes in producing large-format glazed vitrified tiles (GVT) and porcelain glazed vitrified tiles (PGVT). Established in 2021, Lonix offers a diverse collection of tiles known for their stunning designs, durability, and performance. Their products are ideal for both residential and commercial spaces, combining function with style.
Lonix Ceramica: Redefining Spaces with Luxury Tiles
When it comes to transforming ordinary spaces into extraordinary ones, Lonix Ceramica stands at the forefront of innovation and design. With a commitment to excellence and a passion for creating aesthetically stunning environments, Lonix Ceramica has become a trusted name in the world of luxury tiles — especially with its exquisite range of GVT tile collections.